

Publish, share, embed and export
Publishing creates a version learners can open. Editing your working scenario and updating that published version are separate tasks.
Before continuing, test every path, save your changes and finish any applicable generated-content review. Use a disposable copy while practising publication and exports.
1. Create a published version
Section titled “1. Create a published version”- Select Publish in the scenario navigation.
- Under Publish a new version, enter a Version title that helps you recognise this release.
- If a Version selector appears, check the saved version you intend to publish.
- Select Publish scenario once. Wait for the new entry under Published versions.
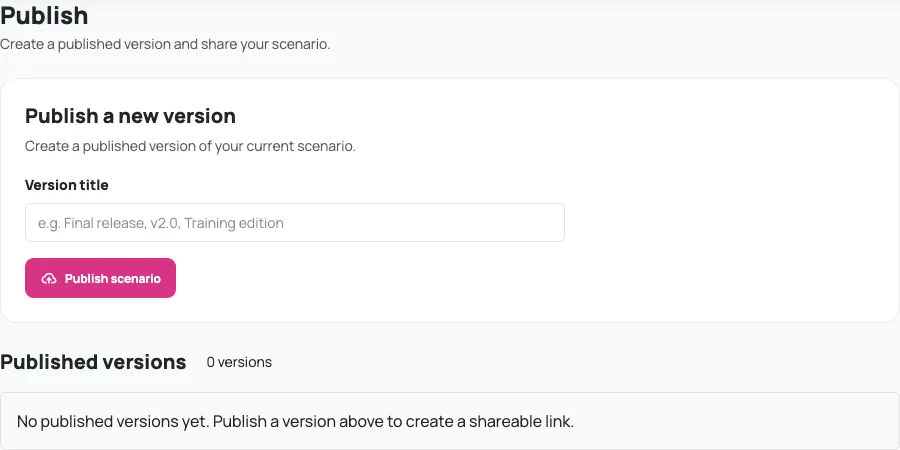
Your account limits how many versions you can publish. If the limit is reached, review existing publications or your plan before creating another.
2. Obtain and test the sharing link
Section titled “2. Obtain and test the sharing link”Under the published entry, use Copy link beside Shareable URL, or Open to try it in another tab. Test the link as a learner, including Start, each decision route, images and audio. Treat a public link as shareable with anyone who receives it.
The editor’s Preview address is not the published sharing link. A successful preview does not check that you published the intended version.
3. Update after editing
Section titled “3. Update after editing”- Make and save the changes in the working scenario.
- Preview the affected routes and complete any applicable review again.
- Return to Publish and find the existing published entry.
- Select Update to latest and wait for confirmation.
- Reopen its sharing link and check the updated experience.

Draft edits do not automatically refresh the publication. Check the version label carefully, especially when publishing a saved version rather than Main. Previously downloaded ZIP packages are separate files: create and distribute a new export when updating those copies.
4. Embed on a website
Section titled “4. Embed on a website”In the publication’s Export & share section, select Embed. This copies iframe code to your clipboard; the page confirms Embed code copied to clipboard.
Paste that code into a website area that accepts iframes. Test the actual page, including its size and audio behaviour. Your website’s security settings or editing tools may restrict embeds. The iframe uses the published player; it does not turn the scenario into an offline file.

5. Choose an export
Section titled “5. Choose an export”HTML, SCORM and xAPI exports require the applicable plan access; the current interface marks these as Pro features when access is missing. They are built from a published version, rather than unsaved editor changes.
Choose HTML, inspect HTML export — Media, then select Download ZIP when your settings are ready. Use hosted media keeps dependencies on hosted files. Include media in ZIP packages supported media and produces a larger download.

Including media reduces dependence on hosted assets; it does not guarantee offline playback of third-party embeds, online fonts, analytics or connected services. Read the current size limits in the export panel. Test the extracted package on the web hosting you intend to use.
Choose SCORM and select the version your LMS supports: SCORM 1.2 or SCORM 2004 4th Edition. Choose the media option and inspect Reporting.
- Advanced — Authored actions keeps the scenario’s existing reporting actions. It does not add automatic completion or pass/fail.
- Automatic — End-step reporting lets you select published steps where arrival genuinely finishes the attempt. The first qualifying end reached fixes the result. Read warnings on endings containing media, activities or navigation: choose Advanced if completion must wait for those activities.
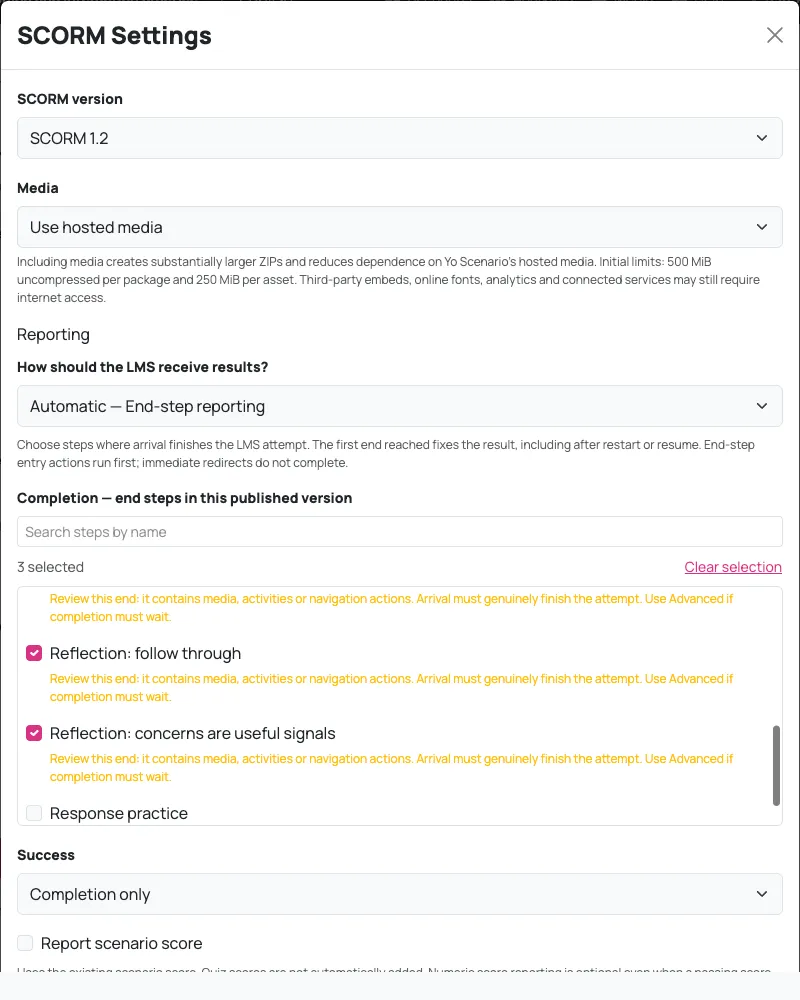
Success can use completion only, end-step outcomes or a passing score. Score reporting uses the scenario score; quiz scores are not automatically added. LMS interaction reporting offers Full or Results only, separately from the optional Enable Yo Scenario Analytics? setting.
Select Download SCORM after checking the settings, then test the package in your target LMS before distributing it. Package creation alone is not proof of LMS completion, resume or scoring behaviour.
Choose xAPI to inspect the LRS and activity settings. The form asks for LRS Endpoint, LRS Username, LRS Password, activity details and an xAPI Actor source. Complete the required activity fields, including Activity Description, before downloading. From LMS needs the LMS launch context; Yo Scenario User Data is offered only when the required name/email setup exists.
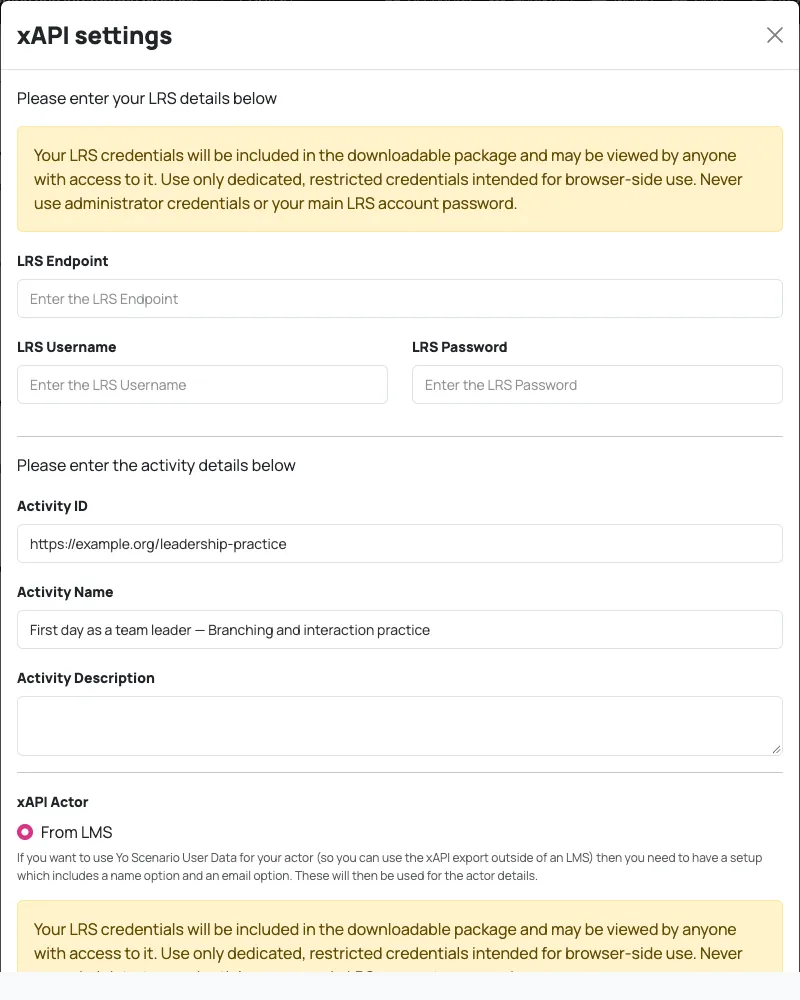
Read the security disclosure: LRS credentials are included in the downloadable package and can be viewed by anyone with access to it. Use dedicated, restricted credentials intended for browser use, never an administrator password. The required acknowledgement does not verify those permissions; the LRS must also allow requests from the launch origin.
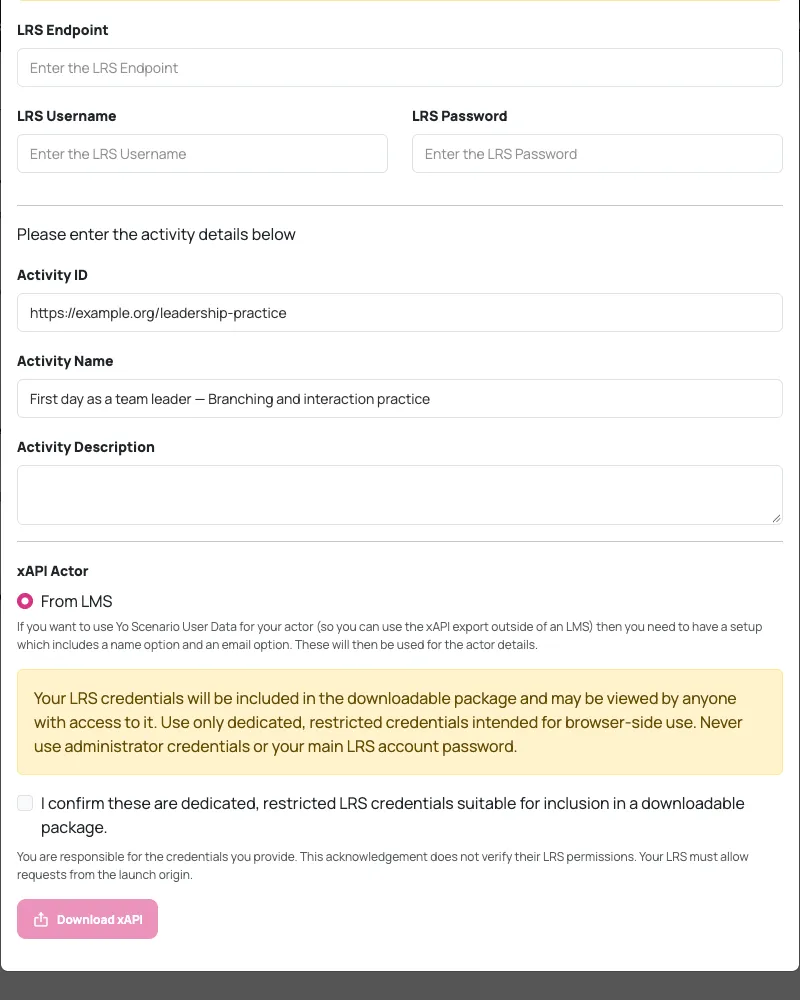
An xAPI export does not make arbitrary scenario activity report automatically. Configure the reporting your activity needs and test it with your intended staging LMS/LRS and actor details. Keep real LRS credentials out of documentation and screenshots.
Final delivery check
Section titled “Final delivery check”Open the final public or embedded link, or launch the exported package in its intended environment. Follow the important routes again. Check media, reporting and screen sizes there before sending it to learners. Use the export’s own error message if a build fails; do not silently substitute hosted media when you intended a bundled package.